MURAL PAINTING
APPLICATIONS & TECHNIQUES
Mural covers a variety of techniques including fresco, encaustic, mosaic, stained glass and photography. The type of mural of most interest to contemporary artists is either painting on canvas, which is then attached to a wall or painting directly on the wall surface itself.
SELECTING A MURAL PAINT
The surface to be painted and the environmental exposure of that surface are important aspects to consider for selecting the right type of paint. The technique and painting style of the artist must also be included. No paint can withstand all environmental conditions such as sun, rain, cold, heat, acid rain and air pollution. Acrylic water emulsion paints however, have proven themselves to be one of the most durable paints available for exterior as well as interior mural painting.
ADVANTAGES OF USING LIQUITEX ACRYLICS FOR MURAL PAINTING
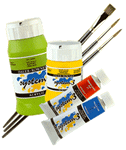
Liquitex is the original artist's acrylic emulsion paint. It offers the advantages of a wide range of unique permanent colors, great versatility in mediums, clear resin system, superior adhesion and detailed label information.
Refer to Part I Liquitex Professional Grade Acrylic Paint Section for additional information on advantages in mural painting.
Liquitex makes two types of acrylic paint suitable for murals:
- Professional Grade Medium Viscosity Concentrated Artist Color
- Professional Grade High Viscosity Artists Color.
Professional Grade Medium Viscosity Concentrated Artist Color
- Consistency similar to heavy cream. Can be spray applied.
- Dries to a smooth, even surface with good leveling that shows little brush marks.
- Pigment load is equal to High Viscosity Artist
- Colors and is ideal for large mural coverage.
- Flat paint film catches less dirt and requires less cleaning over time.
Professional Grade High Viscosity Acrylic Colors
- Heavy-bodied paints have a smooth thick buttery consistency and oil-like performance.
- Used in mural applications for a heavy build up of paint texture (impasto) and brush stroke.
Coverage
Medium Viscosity Concentrated Artist Color will cover approximately 400 sq.ft./gallon.
- Coverage is reduced on a rough surface. Coverage is extended when paint is spray applied.
- To double paint coverage of either Medium or High Viscosity Acrylic, mix 1 part Acrylic Color to 1 part Liquitex Opaque Extender or Gel Extender Medium.
- Use these mixtures during underpainting of murals to economically double the volume of paint. For best permanence, the top layers of the mural should be painted using Lightfastness I rated colors with no Opaque Extender added.
MURAL SURFACES
False and Separate Walls
The best support for mural painting is a false wall erected in front of an existing wall.
- This eliminates the dangers inherent in expansion and contraction of plaster and masonry. It also protects against cracking, peeling and water damage and allows for easy removal of the mural.
- The mural wall can also be a stretched canvas panel or canvas adhered to a rigid panel. A false wall for interior murals allows the artist to paint the mural in the studio rather than on location.
Existing Walls
Murals can also be painted on existing wall surfaces. Proper surface preparations must be observed to insure longevity of the mural.
- A surface that has been previously painted will not be as permanent as a surface that has never been painted or has been stripped of all existing paint.
- The surface must be free of any previous oils or silicones or paint may peel. Paints and oils can be removed with the proper solvents or by sand blasting before painting.
SURFACE PREPARATION
The longevity of a mural is directly related to the surface preparation.
Selecting a Surface
- It is important that the surface does not contain moisture. New concrete may not be free of moisture for 2 to 3 months after drying.
- Make sure the surface will not get wet from water seeping through existing outside walls. Moisture can be absorbed behind a substrate and cause the paint to peel from the surface.
Cleaning the Surface
There must be no grease, wax or oil on the surface and the surface needs to be structurally sound and free of loose particles.
- Remove all existing loose particles or damaged painted surfaces. If the wall has been painted with oil paint or is peeling, strip all existing paint.
- If the surface has been painted with acrylic paint, sand entire surface.
- Clean surface with a degreaser, such as TSP mixed with warm water.
- If mold or mildew is present, use a stiff brush and scrub with a mixture of 1 part bleach and 3-4 parts water. Rinse twice with warm water and allow to fully dry.
Applying the Ground (Priming the Surface)
After the surface has been cleaned, it must be prepared to accept the paint.
Fixing Cracks and Uneven Surfaces
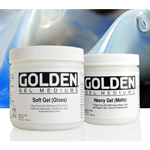
- For smooth surfaces: Brush on one coat or spray two coats of Liquitex Matte Medium.
- For rough surfaces: Trowel on one-two coats of Liquitex Matte Gel Medium.
- Allow to fully dry. Mediums are clear/ translucent when dry and cloudy-milky when wet.
- Painting can proceed over these sealing coats
- Most artists prefer a white surface to use as a basis for the mural cartoon or sketch and to establish color relationships.
Priming The Surface
- Apply Liquitex Acrylic Gesso for a white ground; Colored Gesso for a colored ground.
- If necessary thin gesso with no more than 50% Matte Medium. Brush or spray apply.
- For spray application, thin gesso with a mixture of 50% Matte Medium and 50% water. This will reduce surface tooth and absorption.
- Over thinning with water alone can cause cracking or result in poor adhesion.
- Multiple coats of gesso can be applied and wet sanded to produce a smooth ground. Wet sanding will make the surface somewhat brittle. Protect the back of stretched canvas with cardboard.
Various Mural Surface Preparations
New Wood: Sand surface. Seal with 1 coat of Matte Medium. Apply 1-2 coats of Gesso. Paint withMedium or High Viscosity Artist Colors. Apply isolation coat ofGloss Medium & Varnish. Let dry 48 hours. Apply 1-2 coats of Matte or Gloss Soluvar.
Painted Wood: Remove loose material. Sand or Strip. Seal with 1 coat of Matte Medium. Apply 1-2 coats of Gesso. Paint with Medium or High Viscosity Artist Colors. Apply coat of Gloss Medium & Varnish. Let dry 48 hours. Apply 1-2 coats of Matte or Gloss Soluvar.
New Masonry: Must be dry and cured. Apply Matte Medium for smooth surfaces, Matte Gel Medium for rough surfaces. Apply 1-2 coats of Gesso. Paint with Medium or High Viscosity Artist Colors. Apply isolation coat of Gloss Medium & Varnish. Let dry 48 hours. Apply 1-2 coats of Matte or Gloss Soluvar.
Painted Masonry: Remove loose material. Clean, Sand or Strip. Must be dry and cured. Apply Matte Medium for smooth surfaces, Matte Gel Medium for rough surfaces. Apply 1-2 coats of Gesso. Paint with Medium or High Viscosity Artist Colors. Apply isolation coat of Gloss Medium & Varnish. Let dry 48 hours. Apply 1-2 coats of Matte or Gloss Soluvar.
New Sheetrock: Apply an acrylic emulsion compatible industrial sealer such Aqualock.
Unprimed & Painted Metal: Remove grease, dirt and solvents. Sand surface. Wash with a prep solution for the painted metal being used. Apply an acrylic emulsion compatible primer. Apply Matte Medium for smooth surfaces and Matte Gel Medium for rough surfaces. Apply 1-2 coats of Gesso. Paint with Medium or High Viscosity Artist Colors. Varnish wit isolation coat of Gloss Medium & Varnish. Let dry 48 hours. Apply 1-2 coats of Matte or Gloss Soluvar.
CHOOSING COLORS
Since outside murals are subject to the harshest environmental conditions, color selection is very important. The Liquitex Hand Painted Color Chart and "How to Mix and Use Color" Book, list all colors along with their lighffastness rating, mass tone, tint, glaze and color intermixes.
All Liquitex Acrylic Colors list on their label, the permanency of pigments used according to the standards established by the American Society for Testing and Materials (ASTM). Refer to the Liquitex Technical Information Section for more information on Lightfastness Ratings. Only Category I pigments are recommended for outdoor mural painting.
PAINT APPLICATION
Painting can proceed after surface preparation. The drawing can be scaled up an using a grid system or transferred to the surface with a cartoon. The outline can then be "fixed" with a spray coating of 50% Matte Medium and water.
Thinning Colors during Painting
- If acrylic colors need to be thinned use a mixture of 50% water and Gloss Medium & Varnish or Matte Medium.
- Do not use water only for thinning. Outside murals exposed to weather need maximum film integrity. Too much water will weaken the paint film.
Temperature, Moisture and Humidity For Exterior Painting
- Ideal temperature for paint application: 65-75 F; Lowest temperature: 50F.
- Varnish application during rain may trap moisture, hinder adhesion and cause clouding.
ADHESION TEST
To ensure proper adhesion, a test should be done either on a surface similar to the actual mural surface.
Directions
- Apply the paint or medium to prepared surface and let dry thoroughly. Wait 72 hours for acrylic paint to cure before continuing. (longer in more humid conditions).
- When completely dry, score surface in a , crosshatch pattern using a sharp knife.
- Apply masking tape firmly to scratched surface and firmly burnish.
- Remove masking tape slowly.
- If any paint comes off with the tape, good surface adhesion has not been achieved. Either a different surface preparation is necessary or the particular support is not suitable for the paint or medium tested.
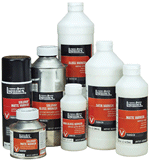
FINAL PROTECTIVE VARNISHES
After the mural is complete, a final protective varnish should be applied to extend the life of the mural, protect it from weathering, pollution and dirt. The varnish should be a removable type such asLiquitex Soluvar, to allow the removal of pollutants, dirt and graffiti.
Mural varnish application occurs in two steps:
- An isolation varnish layer
- A removable varnish layer.
Refer to Part I Liquitex Varnishes: for more information on varnishes and proper application.
Soluvar Gloss and Matte Final Picture Varnish Application
- Apply 1-2 layers of Gloss Medium & Varnish as an isolation barrier. This barrier physically separates the painting from the Soluvar Varnish and seals the surface. This allows a more even application of Soluvar Varnish and protects the painting surface when the Soluvar Varnish needs to be removed.
- To insure proper adhesion, clean Om surface with a lint free rag dampened with mineral spirits.
- Apply 1-2 layers of Soluvar Varnish. Let dry 24 hours between coats.
Intermix Gloss and Matte Soluvar Varnish for a variety of sheens. Soluvar Matte Varnish contains matting agents that settle during storage. Gently stir with a wooden dowel or brush handle until completely re-dissolved. Do not shake.
Removing Soluvar Final Picture Varnish
If the mural becomes dirty or abused, removing the varnish can restore it. Cleaning will not affect the underlying painting if the varnish was properly applied.
- Remove varnish in clean, well-ventilated area.
- Wear a duel filter respirator (NIOSH approved) and neoprene gloves. Dampen a small piece of lint free, soft, white cloth with mineral spirits (not "odorless") or turpentine nothing stronger. Do not use ketones or paint removers.
- Work horizontally. Apply mineral spirits generously and allow it to lay on surface for 15-30 minutes. Check periodically. Longer times may be necessary, depending upon age of artwork and strength of mineral spirits. If varnish is not dissolving or dissolving slowly, use a higher strength mineral spirits or turpentine. Cover surface with plastic to slow down evaporation of mineral spirits). Stronger mineral spirits are not labeled as such, but have a stronger odor.
- Rub cloth gently over a 1 square foot area until varnish starts to dissolve.
- Using a clean cloth and clean solvent, rub the area again to remove residue. Repeat this procedure for the entire area to be cleaned. If any paint color shows on the cloth, stop immediately and allow the surface to dry.
- Allow painting to dry before reapplying a fresh coat of Soluvar Final Picture Varnish.